Most people start woodworking by rescuing something, not building it. Six picks for stripping, sanding and re-coating a piece without sanding through the veneer.
For a first refinishing job the tool that decides the result is the sander, and the Bosch ROS20VSC is the pick: variable speed matters more on old furniture than on new wood, because you need to be able to slow down over veneer and edges where a single-speed machine will cut through before you notice. Everything else on this page is cheap by comparison.
A lot of people arrive at woodworking sideways — not by building something, but by deciding that the dresser in the spare room deserves better. It is a good way in. The piece is free or nearly free, the skills transfer directly (surface prep and finishing are most of what makes new furniture look made rather than assembled), and the failure modes are instructive rather than expensive.
But refinishing is not the same job as finishing new wood, and the difference is what this page is about. On new wood you are working with clean, thick, flat stock and you control the sequence. On an old piece you are working through an unknown coating, over a surface that may be veneer thinner than a credit card, around profiles and spindles no flat tool will reach, on a shape you cannot clamp easily. The tools that handle that are a slow sander, something that scrapes rather than abrades, and a lot of sandpaper in several grits.
Before you buy anything, two decisions. Is it veneer or solid? Look at the edges — a thin dark line of a different colour, or grain that stops dead at the edge rather than wrapping around it, means veneer, and veneer means you scrape and hand-sand rather than machine-sand flat. And does it need stripping at all? A tired but intact finish often only needs cleaning, a light scuff and a fresh coat on top, which is a weekend instead of a month.
Prices below are live and dated.
How this is funded: we earn a commission if you buy through our links, at no extra cost to you. It never changes which tool we recommend, and we’ll tell you plainly when to skip one. Full disclosure.
Quick picks
Ranked on the specs that matter for a beginner and honest buyer fit. Select a row to jump to the full write-up. We haven’t hands-on-tested these — here is exactly what we do instead.
#
Product
Best for
Price
1
Bosch ROS20VSC 5 in Random Orbit Sander
The sander most people should buy. Variable speed, a genuinely effective micro-filter dust canister, and a low-vibration body you can hold for an hour without your hands buzzing. It is the boring right answer.
S Satc 72-Piece 5-Inch 8-Hole Hook and Loop Sanding Disc Assortment
The cheapest way to find out which grits you actually burn through. An assortment is the right first purchase precisely because a beginner does not yet know whether they need more 80 or more 220 — after two projects you will.
A flat rectangle of hardened steel that costs about as much as a sandwich and, once you can sharpen it, replaces most of your sanding. This is the one experienced woodworkers keep buying.
3M Pro Grade Precision Sanding Sheets, Assorted Grits 80/120/180
For everywhere a power sander cannot reach: inside corners, profiles, the last pass along an edge. The no-slip backing is the real feature — it means you can hold a sheet against a shaped edge without it folding away from your fingers.
Real polyurethane protection with none of the brush anxiety. Because it is thinned for wiping, each coat is thin enough that dust nibs and runs mostly cannot happen — you just build three or four coats instead of two.
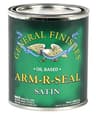
General Finishes Arm-R-Seal Oil Based Topcoat, Satin, 1 Quart
The finish serious hobbyists standardize on. It wipes on like the cheaper products, cures harder than most of them, and levels beautifully — the reason it appears on so many tabletops that get real use.
The sander most people should buy. Variable speed, a genuinely effective micro-filter dust canister, and a low-vibration body you can hold for an hour without your hands buzzing. It is the boring right answer.
Strengths
+Variable speed lets you slow down for veneer and finishes instead of burning through them
+Microfilter canister captures a real share of the dust without a vacuum attached
+Notably low vibration for the class — the thing you feel after twenty minutes
Trade-offs
−2.5 amps is modest; on heavy stock removal a bigger motor is faster
−Hook-and-loop pads wear out and are a recurring cost on every sander of this type
Type
Random orbit sander (corded)
In the set
Single tool
Material / build
Composite body, hook-and-loop pad
Key spec
5 in pad, 2.5 A, variable speed
Best for
Best overall for a first shop
Worth knowing. "Random orbit" means the pad spins and oscillates on an offset at the same time, so the abrasive never repeats its path. That is why it leaves no swirl pattern, and it is why this beats a cheap square palm sander for finish work.
Specs read from the product listing, on August 11, 2026. “Not listed” means the listing doesn’t state that figure.
#2Best for the grit ladder
S Satc 72-Piece 5-Inch 8-Hole Hook and Loop Sanding Disc Assortment
The cheapest way to find out which grits you actually burn through. An assortment is the right first purchase precisely because a beginner does not yet know whether they need more 80 or more 220 — after two projects you will.
Strengths
+Covers a full progression in one inexpensive purchase
+Enough of each grit to finish a couple of real projects
+8-hole pattern fits the common 5-inch random orbital sanders
Trade-offs
−Budget abrasive dulls noticeably faster than premium discs
−Assortments always leave you with a stack of the grit you never use
Type
5-inch hook-and-loop sanding discs
In the set
72 pieces
Material / build
Coated abrasive, hook-and-loop backing
Key spec
5 in, 8-hole, assorted grits
Best for
Best variety pack to start with
Worth knowing. Check the hole pattern before buying anything. Five-inch discs come in 5-hole and 8-hole patterns and they are not interchangeable — the wrong one blocks your sander's dust extraction entirely.
Specs read from the product listing, on August 11, 2026. “Not listed” means the listing doesn’t state that figure.
#3Best for veneer and tight detail
Bahco 474 Cabinet Scraper, 125 x 62 x 0.80 mm
A flat rectangle of hardened steel that costs about as much as a sandwich and, once you can sharpen it, replaces most of your sanding. This is the one experienced woodworkers keep buying.
Strengths
+0.80 mm is the classic thickness — stiff enough to control, springy enough to flex
+A single card handles flats, edges and glue clean-up
+Cheap enough that ruining your first burr costs nothing
Trade-offs
−Useless until you learn to turn a burr — budget an hour for that
−Gets uncomfortably hot under your thumbs on long sessions
Type
Card scraper
In the set
Single tool
Material / build
Not listed
Key spec
125 x 62 mm, 0.80 mm thick
Best for
The one scraper to learn on
Worth knowing. A card scraper does not scrape in the way the name suggests. A properly turned burr is a tiny cutting edge, and it takes real shavings, not dust.
Specs read from the product listing, on August 19, 2026. “Not listed” means the listing doesn’t state that figure.
#4Best for profiles and spindles
3M Pro Grade Precision Sanding Sheets, Assorted Grits 80/120/180
For everywhere a power sander cannot reach: inside corners, profiles, the last pass along an edge. The no-slip backing is the real feature — it means you can hold a sheet against a shaped edge without it folding away from your fingers.
Strengths
+No-slip backing makes hand sanding far less tiring
+Three grits gives a usable progression out of one pack
+Tears cleanly into quarter sheets for a sanding block
Trade-offs
−Hand sanding is slow — this is a finishing tool, not a stock remover
−Sheets clog quickly on soft, resinous pine
Type
Sandpaper sheets
In the set
Single tool
Material / build
Coated abrasive with no-slip backing
Key spec
Assorted 80 / 120 / 180 grit
Best for
Best sheets for hand sanding
Worth knowing. The final pass on any project should be by hand, along the grain. A random orbital leaves faint circular scratches that are invisible on bare wood and obvious the second a finish goes on.
Specs read from the product listing, on August 11, 2026. “Not listed” means the listing doesn’t state that figure.
Real polyurethane protection with none of the brush anxiety. Because it is thinned for wiping, each coat is thin enough that dust nibs and runs mostly cannot happen — you just build three or four coats instead of two.
Strengths
+Genuine film protection against water rings and wear
+Wiping avoids the brush marks that ruin most first poly jobs
+Satin sheen hides small imperfections better than gloss
Trade-offs
−Needs three or more coats, with drying time between each
−Oil-based poly adds a permanent warm amber tint
Type
Wipe-on polyurethane
In the set
Single tool
Material / build
Oil-based polyurethane
Key spec
1 pint, satin
Best for
Best durable finish for a beginner
Worth knowing. The amber tint is not a flaw, it is chemistry — oil-based finishes yellow as they cure and continue to warm over years. On walnut it is lovely; on pale maple, use the water-based version instead.
Specs read from the product listing, on August 11, 2026. “Not listed” means the listing doesn’t state that figure.
#6Best for a top that gets used daily
General Finishes Arm-R-Seal Oil Based Topcoat, Satin, 1 Quart
The finish serious hobbyists standardize on. It wipes on like the cheaper products, cures harder than most of them, and levels beautifully — the reason it appears on so many tabletops that get real use.
Strengths
+Cures notably harder than hardware-store wipe-on poly
+Levels out to a very even surface without brush work
+Widely regarded as forgiving despite the professional reputation
Trade-offs
−Twice the price of the supermarket equivalent
−Long recoat times — this is a weekend finish, not an evening one
Type
Wipe-on oil-based urethane topcoat
In the set
Single tool
Material / build
Oil-based urethane
Key spec
1 quart, satin
Best for
Best premium wipe-on topcoat
Worth knowing. Store wipe-on finishes upside down or squeeze the air out of the can. Oil-based products skin over from oxygen contact, and half a wasted quart costs more than the trick saves.
Specs read from the product listing, on August 11, 2026. “Not listed” means the listing doesn’t state that figure.
What to look for before you spend anything
1. Speed control, not power
Nothing on a piece of furniture needs a powerful sander. Everything on an old piece benefits from a slow one. If you are choosing between a stronger single-speed machine and a weaker variable-speed machine for this job, take the variable speed. The full comparison of the class is in the random orbital sander roundup, and which sander do you need covers why a belt sander is the wrong tool to point at furniture.
2. Enough grits to climb the ladder properly
The single most common refinishing mistake is skipping grits, and it is caused by only owning two. The sequence that works on furniture is coarse enough to remove the old coating (80 or 100), then 120, then 150 or 180 to remove the scratches the previous grit left. Each step only has to erase the step before it — which is why jumping from 80 straight to 180 does not work: the fine paper has no ability to remove an 80-grit scratch, so you just polish it.
Stop at 180 for an oil or wipe-on finish on most furniture. Going to 320 on bare wood before an oil-based product can actually reduce how much finish the surface takes, which shows up as a patchy sheen. How to sand wood properly has the full sequence and the raking-light trick for finding what you missed, and the sanding disc guide covers disc sizes, hole patterns and what to buy in bulk.
3. Something that cuts without abrading
This is the pick most people have never considered. A card scraper takes a fine shaving off a surface using a burnished hook on its edge — no dust, no heat, and crucially no risk of dishing a surface or racing through veneer the way a powered sander does. On refinishing work it earns its place three ways: lifting a stubborn old coating in a controlled line, levelling a run or a drip in the new finish without going back to bare wood, and cleaning up the inside corners and narrow rails a sander pad will not fit into.
It needs sharpening to work — a flat file, a stone, and a burnisher to turn the hook. That is a real learning curve, and how to use a card scraper walks through it. A scraper that has not been burnished does nothing at all, which is why so many sit unused in drawers.
4. Hand paper for everything with a shape
Turned legs, carved detail, beading, the curve of a chair back: all of it is hand work, and all of it is where a refinishing job is won or lost, because those are the places an old finish survives and announces itself after you re-coat. Sheets with a no-slip backing matter more than they sound — the paper is being wrapped around a shape and pulled, and ordinary sandpaper tears at exactly the wrong moment.
Stripping: what we are not selling you
There is no chemical stripper in our picks, and that is deliberate rather than an oversight. Stripper choice depends on what the existing coating is (shellac, lacquer, varnish and modern polyurethane all respond differently), on whether the piece is veneered, and on whether you can work outdoors — and the honest answer for a first project is usually that you do not need one. For a piece you are taking to bare wood, mechanical removal with the sander and scraper is slower but far more controllable and far less unpleasant. For a piece whose finish is intact, the right move is not to strip at all.
The exception is detail work: if the piece is carved or turned, stripper is genuinely the only sane route, because you cannot sand a carving without destroying it. If you go that way, read the product’s own directions rather than ours, work outside or with real ventilation, and dispose of the rags as a fire risk — the rag rule in shop fire safety applies to finish-soaked rags too, not just to oil.
Putting a finish back on
Almost every refinished piece wants a wipe-on topcoat rather than a brushed one. The reason is practical: brushing a clear finish well is a skill, and brush marks on a dining table are visible forever, whereas wiping a thin coat on with a rag is genuinely hard to get wrong. The trade is coats — thin coats mean more of them.
The split between our two finish picks is about how hard the surface gets worked. For a dresser, a bookcase, a side table or a chair, the hardware store wipe-on polyurethane is plenty and costs a fraction. For a dining table, a desk, a kitchen surface — anything that gets wiped down, written on, or has hot plates put on it — the premium oil-based topcoat cures harder and is the one people standardise on for exactly that reason. Neither is a fast finish; both want a full day between coats and will keep hardening for days afterwards.
The application details — how thin, how to avoid dust nibs, when to scuff between coats, why the last coat looks worse before it looks better — are in how to apply a wood finish, and wood finishes for beginners compares all five finishes we stock against each other if you want to consider an oil or a wax instead.
The order of operations, start to finish
Clean it first. Decades of wax and polish will clog sandpaper in minutes and will stop a new finish bonding. Mineral spirits and a rag, before any abrasive touches it.
Decide veneer or solid, at the edges. This decision changes every step that follows.
Take the hardware off and keep it in a labelled bag. Sanding around a hinge plate guarantees a visible outline.
Remove the old coating— sander on the flats at a reduced speed, scraper on the edges and corners, hand paper on the shapes.
Climb the grits without skipping, and check with a light held low across the surface before you believe you are done.
Repair before finishing,not after. Loose joints are glued now — the wood glue roundup covers which bottle, and old hide glue joints can often be re-glued with hide glue rather than taken apart.
Wipe on thin coats, and stop when the surface looks even rather than when the can is empty.
One closing thought. A refinished piece does not have to look new, and the pieces that end up best usually keep some of their history — the worn edge, the darkened patch where a hand has rested for fifty years. Sanding all of that off is the most common way to make an old dresser look worse while technically doing everything right. If the refinishing bug takes, the natural next step is building rather than rescuing, and the furniture tool list picks up exactly where this page stops.
Frequently asked questions
What tools do I need to refinish furniture?+
A random orbit sander with variable speed, sanding discs in at least three grits (80 or 100, then 120, then 150 or 180), a card scraper for veneer and inside corners, hand sanding sheets for turned and carved parts, and a wipe-on topcoat. That is the whole kit for a first piece. A belt sander, heat gun and detail sander are the three tools most often bought for this job and least often useful on it.
What is the best sander for refinishing furniture?+
A 5-inch random orbit sander with variable speed. The random orbit action avoids the circular swirl marks that show through a clear finish, and the speed control is what lets you work safely over veneer, along edges and on glue lines where a single-speed machine cuts through before you can react. Power is not the deciding factor on furniture; control is.
How do you refinish a table top without stripping it?+
If the existing finish is intact and only looks tired, clean it thoroughly with mineral spirits to remove wax and polish, scuff it lightly with 180 to 220 grit so the new coat has something to grip, wipe off the dust, and apply thin coats of a compatible wipe-on finish on top. You only need to strip to bare wood when the coating is failing, flaking, or you want to change the colour.
How do you know if furniture is veneer or solid wood?+
Look at the edges and the ends. On veneer you will usually see a thin line of different-coloured material where the face sheet meets the substrate, and the grain pattern stops at the edge instead of continuing round it. Also check whether the grain on the top is suspiciously symmetrical — book-matched veneer often is. If it is veneer, hand sand and scrape rather than machine sand, and never run a belt sander over it.
What grit sandpaper do you use to refinish furniture?+
Start at 80 or 100 to remove the old coating, move to 120, then finish at 150 or 180 for most oil-based and wipe-on finishes. Do not skip grits — each one only has the ability to remove the scratches left by the one before it, so going from 80 straight to 180 just polishes the coarse scratches instead of removing them. Going finer than about 220 on bare wood can reduce how much finish the surface absorbs.
Is refinishing furniture a good first woodworking project?+
Yes, and for two reasons. The skills that decide the result — surface preparation and finishing — are the same skills that make new furniture look well made, so nothing is wasted. And the piece is usually free or close to it, so a mistake costs time rather than money. The main caution is to practise on something solid rather than veneered, because veneer is unforgiving of a powered sander.
NFPA — Safety with oily rags (tip sheet) — NFPA's own wording: never leave cleaning rags in a pile; take them outside to dry, spread out and weighed down; put dried rags in a metal container with a tight cover, kept cool and out of direct sunlight (accessed August 31, 2026)
OSHA — Woodworking eTool — OSHA guidance on woodworking hazards, guarding and safe work practices (accessed July 24, 2026)