How to Read a Tape Measure
Counting the little lines, why the hook is supposed to wobble, and the measuring habits that stop two boards marked the same coming out different lengths.
How this is funded: we earn a commission if you buy through our links, at no extra cost to you. It never changes which tool we recommend, and we’ll tell you plainly when to skip one. Full disclosure.
Nobody is born able to read a tape measure, and almost nobody is taught. The usual approach — squinting at the blade and counting little lines from the last number — works, slowly, and goes wrong the moment you are in a hurry or the light is bad. There is a better method, and it takes about two minutes to learn.
Do not count the lines. Halve the inch. That is the whole technique, and it works because the lines on a fractional tape are not a row of equal ticks: they are a hierarchy, and their heights tell you where you are.
The halving method
An inch on a US tape is divided by repeatedly cutting it in half: a half, then quarters, then eighths, then sixteenths. Each round of halving gets a shorter line than the round before it. So instead of counting up from the inch mark, you ask four quick yes-or-no questions:
- Which inch? Read the largest numbered mark before your point.
- Before or after the half? The longest unnumbered line in the inch is the half. This one decision eliminates half the blade.
- Before or after the quarter?Within that half, the next longest line is a quarter — 1/4 or 3/4 depending which half you are in.
- Eighth, then sixteenth. Two more halvings, two more decisions, and you have your answer.
Four decisions instead of sixteen counts. And because you are navigating by line height rather than by counting, you cannot lose your place partway along, which is how counting errors happen.
Reduce the fraction and say it out loud
One habit from the method: say the fraction in its reduced form. “Eight sixteenths” is a correct reading and a bad one, because it hides the fact that you are standing on the half-inch line. “A half” tells you immediately. The same for 4/16 (a quarter), 12/16 (three quarters) and 8/8. Reading in reduced form is the quickest way to notice you have mis-navigated by one halving.
The hook is supposed to move
The small metal hook at the end of the blade slides back and forth, and almost everybody assumes theirs is broken. It is not. The hook moves by exactly its own thickness, which is what makes the tape read correctly in both directions:
- Hooked over the end of a board and pulled, the hook slides outward by its thickness, so the inside face of the hook sits at zero.
- Pushed against an inside surface, the hook slides inward by its thickness, so the outside face of the hook sits at zero.
A hook riveted solid would be accurate one way and wrong by its own thickness the other. The slop is the calibration. What is notnormal is a hook that rattles noticeably further than its own thickness, or one that is bent — both of those are a tape at the end of its life, and a worn tape is a measuring tool that lies quietly.
The practical consequence worth remembering: a tape measure is not a precision instrument. It reads through a moving hook on a flexible blade that bows under its own weight if you extend it far enough. It is the right tool for cutting a part to a length and the wrong tool for fitting a joint, which is a distinction most beginners discover the hard way.
The marks nobody explains
16-inch marks (usually red)
Every 16 inches is highlighted, often in red or inside a box, because 16 inches on centre is the standard spacing for wall studs and floor joists in US framing. Useless for a chest of drawers; genuinely handy when you are hanging shop shelving and need to find the next stud across.
Black diamonds at 19.2 inches
These catch everyone out. 19.2 inches is one fifth of 96 inches, so marking joists at 19.2-inch centres puts five of them in an 8-foot sheet instead of six at 16 inches — one fewer joist per sheet across a floor. It is a framing economy with no application in furniture, and it is the single most-searched mystery on a tape blade.
The numbers that disagree with each other
Many tapes label inches continuously andcall out the feet, so one point on the blade can be marked both 38 and 3′2". They agree — 3 feet 2 inches is 38 inches — but mixing the two systems inside one cut list is a reliable way to cut something a foot short. Pick one convention per project and write everything in it.
The standout, and why it matters more than the length
“Standout” is how far the blade will extend unsupported before it folds over. It is the spec that decides whether you can measure a long board on your own, and it is far more useful day to day than whether the tape is 25 or 35 feet long. A wider, stiffer blade stands out further — which is the real reason the heavy old tapes feel better to use.
What to look for in a tape, and the two tools that replace it
You need one good tape and then you need to stop using it for things it is bad at. Three things matter when choosing one: a blade lock you trust (a tape that creeps while you mark is worse than useless), enough standout to reach across a sheet of plywood unaided, and clear fractional graduations— some tapes print every sixteenth with a tiny number, which sounds helpful and is visual clutter once you are halving rather than counting. Length beyond 25 feet is irrelevant in a garage shop.
The other two tools below are not accessories to the tape; they are what you use insteadof it as soon as parts have to fit each other. A combination square gives you a repeatable short measurement with a rigid rule and no sliding hook, and sets a depth or a gauge line you can return to exactly. A marking gauge scribes a line a fixed distance from an edge, over and over, identically — which is the actual secret behind joints that fit. You are not measuring twice; you are setting once and marking from the part itself.
| Tool | Why you need it | Price |
|---|---|---|
 | One tape, 25 ft, with a lock that holds. Good standout and legible fractional graduations matter far more than extra length. | $21.50 |
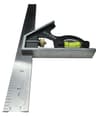 | A rigid 12-inch rule with no sliding hook — the right tool for short, repeatable measurements, depth settings and squaring a line across a board. | $11.98 |
 | Set it once and scribe the same distance from an edge every time. This is how joints end up fitting, and no amount of careful tape work substitutes for it. | $24.80 |
| Starter kit subtotal | $58.28 | |
Live Amazon prices as of October 6, 2026; they change, and we don’t display stale numbers — a tool with no live price shows “Check price” and is left out of the subtotal. #ad How we’re funded.
The habits that prevent wrong cuts
Reading the tape correctly is the easy half. Almost every mis-cut part in a beginner’s shop comes from the process around the measurement, not the measurement itself.
- Write it down immediately, with units, on the board or on a list. A number held in your head while you walk to the saw is the number most likely to change on the way.
- Mark with a V, not a line.A single line leaves you guessing which end of it you meant; the point of a V is unambiguous. Then mark which side of it is waste — a scribble on the offcut side takes a second and prevents a part cut a blade-width short.
- Use one tape for the whole project. Two tapes can disagree by a sixteenth at the hook, and nothing is more baffling than parts that match their numbers and not each other.
- Stop measuring once the parts exist. For a part that has to match another part, hold them together and mark from the real thing. For a shelf in a carcass, measure the actual opening rather than the drawing.
- Never measure each part from the end of the one before it. Every cut eats a blade width, and five parts marked end-to-end from one layout come out progressively shorter. Mark all five from the same reference, or mark one and cut to a stop block.
That last point is cumulative error, and it is the single most expensive measuring habit there is — common beginner woodworking mistakes covers it alongside the rest of the greatest hits, and how to read woodworking plans explains why the dimensions in a cut list often do not match the lumber you can actually buy.
When to leave the tape in the drawer entirely
Experienced woodworkers measure much less than beginners expect, and that is not bravado — it is because a measurement is a translation, and every translation can go wrong. Three alternatives worth knowing:
- A story stick. A scrap of wood with the actual positions marked on it. No numbers, no arithmetic, no misread fraction, and you can hold it against the work to check.
- Direct transfer. Hold the part against the space it has to fill and mark it there. This is how a shelf ends up the length of its opening rather than the length of a number.
- A knife line instead of a pencil line. A pencil line is about a millimetre wide and you still have to decide which edge of it to cut to; a knifed line is a zero-width groove a chisel or a saw drops into. The marking and measuring roundup covers marking knives, and it is the cheapest accuracy upgrade in woodworking.
One last reassurance. If fractions are the part you dislike, you are allowed to work in whichever system you find easier — most tapes sold in the US now carry millimetres on the lower edge, and a millimetre is finer than a sixteenth of an inch, with no halving required. The only rule is to pick one and stay in it for the whole project, because the mistakes are not in either system; they are at the border between them.
Frequently asked questions
How do you read a tape measure to the 16th?
Halve instead of counting. Decide whether your point is before or after the half-inch line (the longest line between the inch marks), then before or after the quarter within that half, then the eighth, then the sixteenth. Each line length on the blade is one step smaller than the one above it, so four yes/no decisions get you to a sixteenth without ever counting sixteen lines.
What are the little lines on a tape measure?
They are halvings of the inch, and their heights tell you which is which. The longest line between the numbers is the half inch, the next longest are the quarters, then the eighths, then the shortest are the sixteenths. Some tapes go to thirty-seconds for the first inch or two only. The height of the line is the information — a tape with all its lines the same length would be nearly unusable.
Why does the hook on a tape measure move?
On purpose, and it is a feature rather than wear. The hook slides by exactly its own thickness so the tape reads correctly both ways: pulled against the end of a board it slides out to compensate for the metal, and pushed against an inside surface it slides in. A hook rivetted solid would be wrong in one of those two directions. If yours is loose enough to rattle well beyond its own thickness, that one is worn out.
What do the black diamonds on a tape measure mean?
They mark 19.2-inch intervals, which is five equal joists or studs in an eight-foot run instead of the usual six at 16 inches. They are a framing layout aid and have no use in furniture work, which is why most woodworkers never find out what they are for. The red marks or boxes every 16 inches are the standard stud and joist spacing for the same reason.
How accurate is a tape measure for woodworking?
Accurate enough for cutting parts to length, and not the right tool for fitting a joint. A tape is reading through a sliding hook on a flexible blade that can bow, so repeating a measurement to better than about a sixteenth is optimistic. For joinery, stop measuring: hold the actual parts together and mark the actual line with a knife or a marking gauge, so the mark is the part rather than a number copied twice.
Should you measure from the one-inch mark?
Rarely, and only for a precise inside measurement where the hook is in the way. It is a well-known trick and it is also the most common source of a part cut exactly one inch short, because the subtraction happens in your head at the moment you are concentrating on something else. A better habit is to use a combination square or a story stick for inside work, and keep the tape for lengths where the hook can do its job.
Sources
- USDA Forest Products Laboratory — Wood Handbook (FPL-GTR-190) — The U.S. government reference on wood as an engineering material (accessed July 24, 2026)
- OSHA — 1926.301, Hand tools — Paragraph (a): unsafe hand tools must not be issued or used. Paragraph (d): the wooden handles of tools must be kept free of splinters and cracks, and kept tight in the tool — which is the standard behind fitting a handle to a bare rasp tang (accessed August 31, 2026)
Keep reading
Best marking and measuring tools
The full layout kit: squares, gauges, knives and dividers, and which ones actually change your accuracy.
See the picksHow to read woodworking plans
Cut lists, nominal versus actual sizes and the dimensions a drawing assumes you will work out yourself.
Read the guideCommon beginner woodworking mistakes
Cumulative error, reference faces, and the measuring habits that cost people a project.
Read the mistakes guideHow to square up a board
Where measuring stops being useful and reference surfaces take over.
Read the guideBest squares for beginners
Try squares, combination squares and speed squares — which to own and how to check one is actually square.
Compare the squares