How to Drill Straight Holes Without a Drill Press
Why a hand-held drill wanders, the two-square trick that fixes it, and the bits that start exactly where you marked instead of skating off the line.
How this is funded:we earn a commission if you buy through our links, at no extra cost to you. It never changes which tool we recommend, and we’ll tell you plainly when to skip one. Full disclosure.
A hole that leans is one of those faults that looks trivial and then ruins the assembly. A dowel goes in at three degrees off and the joint will not close. A shelf pin leans and the shelf rocks. A screw pilot hole wanders and the screw breaks out of the side of the board. And unlike a bad cut, you usually do not find out until the parts refuse to go together.
The internet’s answer to this is “buy a drill press”. It is a fine machine and it is not the answer for a first shop, where it wants permanent bench space and solves a problem that two squares and the right bit already solve. Here is how to do it without one.
Why a hand-held drill wanders in the first place
Three separate causes, and they need three separate fixes — which is why people who fix only one of them stay frustrated.
- The bit does not start where you marked. A standard twist bit ends in a chisel-shaped edge across its tip, with no point. On a flat surface that edge skates until it catches something, which may be a sixteenth of an inch from your mark.
- You cannot see the angle. Human beings are poor at judging vertical by eye, especially in the axis pointing away from them. You can usually tell left-to-right lean; front-to-back lean is nearly invisible.
- The bit follows the grain. In wood with pronounced hard and soft growth rings, a bit under heavy pressure deflects toward the softer material as it goes deeper. This is why a hole can start perfectly and still come out crooked.
Fix one: start the hole where you meant to
Mark the centre with an awl, a punch or a firm press of a nail. The small dimple gives the bit somewhere to sit, and it is the difference between a hole on the line and a hole near it.
Then use a brad point bit rather than a twist bit for wood. A brad point has a sharp centre spur that plants exactly where you put it, and two outer spurs that slice the wood fibres cleanly before the main cutting edges remove the waste. That is why a brad point leaves a crisp rim and a twist bit leaves a fuzzy one. Our drill bit roundup covers the types and what each is for.
Start every hole at low speed until the spur is seated a couple of millimetres deep, then bring the speed up. Most wandering happens in the first second.
Fix two: the two-square trick
This is the technique that does most of the work of a drill press, and it costs nothing.
Stand a square on the workpiece immediately beside the mark, blade pointing up, and sight the body of the drill against the blade. Adjust until the drill is parallel to it. Now you have one axis. The trick is the second: put a second square at 90 degrees to the first, so the two form a right-angle corner around the bit, and you can check both axes by moving your head rather than by moving the drill. A speed square works for this too and is cheap enough to own several of — see the squares roundup.
Three details that make it work much better:
- Get your eye down to the level of the bit. Looking down from above hides lean almost completely.
- Use your body, not your wrist. Stand so your forearm is in line with the bit and lower the whole drill with your shoulder. Wrists rotate; that rotation is the lean.
- Have someone sight the second axis for you if there is anyone around. It is dramatically more accurate than doing it alone.
The other no-cost guide is a block of scrap with a hole already drilled square through it — drilled on a friend’s press, or just carefully. Clamp it over the mark and it acts as a bushing that holds the bit square for you. For one specific angled hole, that is exactly what a pocket-hole jig is: a guide block that makes a repeatable hole nobody could drill freehand.
What you need
The bits are the part that matters. Everything else on this page is technique, and technique cannot rescue a bit that will not start where you point it.
| Tool | Why you need it | Price |
|---|---|---|
 | The centre spur plants where you marked instead of skating, and the outer spurs cut a clean rim. The default bit for holes in wood. | $12.98 |
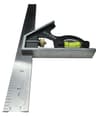 | Stand it beside the bit and sight the drill body against the blade. Two squares at right angles check both axes at once. | $11.63 |
 | Flat-bottomed, large-diameter, overlapping and angled holes — the ones a brad point cannot do. Also the easiest bit to drill an accurate depth with. | $47.99 |
| Starter kit subtotal | $72.60 | |
Live Amazon prices as of September 17, 2026; they change, and we don’t display stale numbers — a tool with no live price shows “Check price” and is left out of the subtotal. #ad How we’re funded.
You also need the drill itself, and for this job an ordinary drill/driver is the correct tool — not an impact driver, whose hammering action is designed for driving fasteners and is actively unhelpful when boring a clean hole. See drill vs impact driver and the drill roundup.
Fix three: let the bit cut
Pressure is what makes a bit deflect. If you are leaning on the drill, the bit is being pushed off course by the grain rather than cutting through it, and you are also generating heat that dulls the edge.
Use firm, steady pressure and match the speed to the bit: large bits slow, small bits fast. A big Forstner run at full speed burns the wood and blues the bit; a small twist bit run too slow chatters and wanders. On deep holes, back the bit out every half inch or so to clear the flutes — packed waste is what causes burning, binding and the sudden grab that twists the drill out of your hands.
Stopping blow-out on the exit face
When a bit breaks through the far side there is nothing supporting the fibres, so they splinter outwards. Two fixes:
- Back it up. Clamp a piece of sacrificial scrap tightly against the exit face and drill into it. Supported fibres cannot lift.
- Drill from both sides. Go until the centre spur just breaks through, stop, flip the board, and use that tiny exit mark to centre the bit for the second half.
Both also apply to a hole that must look clean on a visible face — a shelf side, a cabinet door, anything that gets a finish.
Drilling to an exact depth
A depth stop is the thing a drill press gives you and a hand drill does not. Two substitutes, in order of precision: a stop collar clamped to the bit, or a flag of masking tape wrapped around it at the right depth so the flag sweeps the surface and tells you when to stop. Tape is less accurate and it is free, and for shelf pins it is entirely good enough.
Measure the depth from the cutting edge, not the tip of the point. Forstner bits make this easier because the flat bottom means the depth you measured is the depth you get; a brad point leaves a conical pocket below it.
Two safety notes worth taking seriously
Clamp the workpiece. Small pieces are the dangerous ones: a bit that grabs will spin the piece into a blur, and holding it by hand is how people get cut. This applies especially to the last moment before a bit breaks through, which is exactly when it is most likely to snatch.
Nothing loose near the chuck.A rotating bit catches sleeves, cords, gloves and long hair. Gloves in particular are more dangerous than bare hands around any spinning tool. And wear eye protection — drilling throws chips straight up out of the flutes. See shop safety basics and the safety gear roundup.
One safety note. Power tools deserve respect, not fear. Read the manual, keep the guards on, wear ANSI-rated eye protection every time, and never rush a cut. When something feels wrong, stop and reset — there is no deadline in a home shop.
Frequently asked questions
How do you drill a straight hole without a drill press?
Stand a square on the workpiece right beside the bit and sight the drill body against it, then turn 90 degrees and check the other axis — two squares set at right angles lets you check both at once. Clamp the work, start the hole at low speed with a brad point bit so it cannot skate, and keep your eye level with the bit rather than above it.
Why does my drill bit wander off the mark?
Almost always the bit, not your hands. A standard twist bit has a chisel-shaped point that skates across a flat surface until it happens to catch. A brad point bit has a sharp centre spur that bites exactly where you put it. The other fix is a dimple: punch or awl the centre first so the point has a hollow to sit in.
What is the best drill bit for wood?
A brad point bit for general holes — the centre spur locates it and the outer cutting spurs slice the fibres before the flutes remove waste, so the rim is clean. A Forstner bit for flat-bottomed holes, large diameters, overlapping holes and anything drilled at an angle. Twist bits are a metalworking design that also works in wood, not the best tool for it.
How do you stop wood splintering when the drill exits?
Back the workpiece with a sacrificial scrap clamped tightly behind it, so the fibres at the exit are supported. If you cannot, drill until the point just breaks through, then stop, flip the board and finish the hole from the other side using the point's exit mark as the new centre.
Do I need a drill press for woodworking?
No, not for most beginner work. A drill press gives repeatable perpendicular holes and precise depth, which matters for shelf pins, dowel joinery and metal — but a clamped workpiece, a brad point bit and two squares get you close enough for almost everything. Buy one when repeat accurate holes become the thing slowing you down.
How do you drill to an exact depth without a drill press?
Wrap a flag of masking tape around the bit at the depth you want, so the flag sweeps the surface and tells you to stop. A stop collar is the more precise version, and a Forstner bit makes the depth easier to judge because its flat bottom means the depth you measure is the depth you get.
What speed should you drill wood at?
Large bits slow, small bits fast. A big Forstner or spade bit run fast burns the wood and the bit; a small twist bit run slow wanders. Start every hole slowly regardless of size until the point is seated, then bring the speed up, and let the bit cut rather than leaning on it.
Sources
- OSHA — 1910.243, Guarding of portable powered tools — Circular saws over 2 in blade diameter need upper and lower guards, and the lower guard must return to covering position automatically when the tool leaves the work (accessed August 19, 2026)
- OSHA — Woodworking eTool — OSHA guidance on woodworking hazards, guarding and safe work practices (accessed July 24, 2026)
- American Academy of Ophthalmology — Home workshop eye safety — AAO guidance on protecting your eyes with power and hand tools at home (accessed July 24, 2026)
Keep reading
Best drill bits for woodworking
Brad point, Forstner, spade and countersink — which set to buy and what each one is for.
See the bit picksBest cordless drill for beginners
Five drills compared, and why you should buy the kit rather than the bare tool.
See the drill picksDrill vs impact driver
Which one drills and which one drives, and why the difference matters more than the marketing.
Read the comparisonBest pocket hole jig for beginners
The jig that makes one specific angled hole perfectly repeatable, and turns a drill into a joinery tool.
See the jig picksWhat tools do you need to build a bookshelf?
Where accurate shelf-pin holes actually matter, and the rest of the four-tool list.
See the shelf list