One soaks in and looks superb. The other builds a film and survives a wet glass. Which belongs on your first project, and the wipe-on finish that is quietly both.
If the thing you built will get used, buy wipe-on polyurethane — Minwax Oil-Based Wipe-On Poly is the pick, and it is the honest answer for a first table, desk, shelf or box that will meet a wet glass. It is real polyurethane, so it builds a film that resists water rings and wear, and because it is thinned for wiping there is no brush technique to get wrong. If the thing you built is decorative— a frame, a carving, a box lid, anything you want to look and feel like wood rather than like a surface — buy Danish oil instead.
That is the decision in two sentences, and almost every argument you will read about these two finishes is really an argument about which of those two situations the writer had in mind.
The important thing to understand first: these are not two versions of the same product.Danish oil is a penetrating finish — it soaks into the wood fibers and cures there, leaving almost nothing on the surface. Polyurethane is a film finish — it cures into a continuous plastic layer that sits on top of the wood. That single structural difference drives every practical difference below: protection, repairability, feel, how many coats you need, and what happens when you scratch it.
Three criteria decide it for a beginner, and none of them is durability in the abstract. What will the surface have to survive?How much do you want to feel the wood? And how forgiving does the application have to be, given that you have never done this before and the finish is the last thing you do to a project you have already spent two weekends on.
How this is funded: we earn a commission if you buy through our links, at no extra cost to you. It never changes which tool we recommend, and we’ll tell you plainly when to skip one. Full disclosure.
Quick picks
Ranked on the specs that matter for a beginner and honest buyer fit. Select a row to jump to the full write-up. We haven’t hands-on-tested these — here is exactly what we do instead.
Real polyurethane protection with none of the brush anxiety. Because it is thinned for wiping, each coat is thin enough that dust nibs and runs mostly cannot happen — you just build three or four coats instead of two.
The most forgiving finish a beginner can use. Wipe it on, wait, wipe it off — there are no brush marks to leave, no runs to sand out, and a mistake is fixed by applying more. It is the finish that teaches you that finishing is not scary.
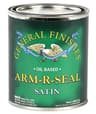
General Finishes Arm-R-Seal Oil Based Topcoat, Satin, 1 Quart
The finish serious hobbyists standardize on. It wipes on like the cheaper products, cures harder than most of them, and levels beautifully — the reason it appears on so many tabletops that get real use.
The lowest-effort finish there is, and the thing you put over other finishes to make them feel right. Wax adds a soft sheen and a slick hand-feel in about ten minutes of work, on almost anything.
Real polyurethane protection with none of the brush anxiety. Because it is thinned for wiping, each coat is thin enough that dust nibs and runs mostly cannot happen — you just build three or four coats instead of two.
Strengths
+Genuine film protection against water rings and wear
+Wiping avoids the brush marks that ruin most first poly jobs
+Satin sheen hides small imperfections better than gloss
Trade-offs
−Needs three or more coats, with drying time between each
−Oil-based poly adds a permanent warm amber tint
Type
Wipe-on polyurethane
In the set
Single tool
Material / build
Oil-based polyurethane
Key spec
1 pint, satin
Best for
Best durable finish for a beginner
Worth knowing. The amber tint is not a flaw, it is chemistry — oil-based finishes yellow as they cure and continue to warm over years. On walnut it is lovely; on pale maple, use the water-based version instead.
Specs read from the product listing, on August 11, 2026. “Not listed” means the listing doesn’t state that figure.
The most forgiving finish a beginner can use. Wipe it on, wait, wipe it off — there are no brush marks to leave, no runs to sand out, and a mistake is fixed by applying more. It is the finish that teaches you that finishing is not scary.
Strengths
+Wipe-on, wipe-off — no brush technique to learn
+Blends into itself, so repairs and touch-ups are invisible
+Brings out grain and color more than any film finish does
Trade-offs
−Minimal surface protection — it soaks in rather than building a film
−Rags soaked in it are a genuine fire hazard until dried flat
Type
Penetrating oil finish
In the set
Single tool
Material / build
Oil and varnish blend
Key spec
1 quart, natural
Best for
Best overall for a first finish
Worth knowing. Oil-finish rags can self-heat as the oil cures and have caused fires. Spread used rags flat outdoors to dry completely, or submerge them in water in a sealed metal container — never leave them balled up in a bin.
Specs read from the product listing, on August 11, 2026. “Not listed” means the listing doesn’t state that figure.
#3Best if you finish one thing a year
General Finishes Arm-R-Seal Oil Based Topcoat, Satin, 1 Quart
The finish serious hobbyists standardize on. It wipes on like the cheaper products, cures harder than most of them, and levels beautifully — the reason it appears on so many tabletops that get real use.
Strengths
+Cures notably harder than hardware-store wipe-on poly
+Levels out to a very even surface without brush work
+Widely regarded as forgiving despite the professional reputation
Trade-offs
−Twice the price of the supermarket equivalent
−Long recoat times — this is a weekend finish, not an evening one
Type
Wipe-on oil-based urethane topcoat
In the set
Single tool
Material / build
Oil-based urethane
Key spec
1 quart, satin
Best for
Best premium wipe-on topcoat
Worth knowing. Store wipe-on finishes upside down or squeeze the air out of the can. Oil-based products skin over from oxygen contact, and half a wasted quart costs more than the trick saves.
Specs read from the product listing, on August 11, 2026. “Not listed” means the listing doesn’t state that figure.
#4Best over oil, for sheen
Minwax Paste Finishing Wax, Natural, 1 lb
The lowest-effort finish there is, and the thing you put over other finishes to make them feel right. Wax adds a soft sheen and a slick hand-feel in about ten minutes of work, on almost anything.
Strengths
+Fastest visible improvement of any product here
+Goes over bare wood, oil or cured poly equally well
+One tin lasts years — also protects hand-tool steel from rust
Trade-offs
−Almost no protection against water or wear on its own
−Needs reapplying periodically as it wears off
Type
Paste finishing wax
In the set
Single tool
Material / build
Blended waxes in solvent
Key spec
1 lb tin, natural
Best for
Best low-effort sheen and top-of-finish polish
Worth knowing. Wax on a plane sole or a saw plate cuts friction dramatically and keeps rust off hand tools between sessions. Half a tin usually ends up doing tool maintenance rather than finishing.
Specs read from the product listing, on August 11, 2026. “Not listed” means the listing doesn’t state that figure.
The comparison, line by line
Danish oil compared with polyurethane across the factors that decide a beginner's first finish
Danish oil
Polyurethane
What it is
A penetrating oil-and-varnish blend that cures inside the wood fibers.
A film-forming resin that cures into a continuous layer on top of the wood.
How you apply it
Flood it on, let it sit, wipe all of it off. No brush, no technique.
Brush-on needs real brush control. Wipe-on is applied like oil, in thin coats.
Protection
Minimal. It resists fingerprints and dulls slowly; it does not stop a water ring.
Genuine. A cured film resists water, spills, heat and abrasion.
How it looks
Wood, slightly deeper and richer. No visible surface, close to no sheen.
A surface you can see, from satin to gloss. Oil-based types add a warm amber tint.
How it feels
Like wood. You feel grain and pore under your fingers.
Like a smooth coating. Even satin reads as a film to the hand.
Repairing damage
Trivially easy. Scuff the area, apply more oil, it blends invisibly.
Hard. A deep scratch means sanding back and recoating a whole surface or panel.
Coats and time
Two or three coats, each a wipe-on-wipe-off session. Forgiving of timing.
Three or more thin coats for wipe-on, with real drying time between each.
Easiest to get wrong
Leaving excess on the surface, which stays tacky instead of curing.
Brush marks, runs and dust nibs — mostly avoided by wiping rather than brushing.
Rag safety
Oil-soaked rags can self-heat as they cure. This is a real fire hazard — see below.
Same caution applies to oil-based poly rags. Treat both the same way.
Where it belongs
Frames, boxes, carvings, hand-tool handles, anything decorative or low-wear.
Tables, desks, shelves, benches, anything that meets a glass or a sleeve.
Where Danish oil genuinely wins
It cannot be applied badly. This matters more than it sounds. The most common finishing disaster is a first poly job with brush marks, sags and dust nibs on a tabletop that took a month to build. Oil has no brush marks to leave and no runs to sand out, because you remove all of it from the surface before it cures. A mistake is fixed by applying more.
It repairs invisibly.Oil blends into itself. Scuff a worn patch with fine abrasive, wipe more oil on, and the repair disappears. A film finish cannot do that — it leaves a witness line where the new coat meets the old.
It shows the wood better than anything else here. A penetrating finish deepens color and figure without putting a layer between your eye and the surface. On walnut, cherry or anything with figure, this is not a small difference.
And it is the right finish for things you hold. Tool handles, a mallet, a box, a spoon rack. A film finish on something handled constantly eventually wears through in patches; oil just gets slightly less oily and takes another coat.
Where polyurethane genuinely wins
Water. This is the whole case and it is enough on its own. A cold glass left on an oiled tabletop leaves a ring, and on a cured poly film it leaves nothing. If the surface will see drinks, plants, wet hands or a kid, the film wins and the argument is over.
Abrasion. Sleeves, plates, laptops, keys. A film takes that wear instead of the wood taking it.
Cleanability. You can wipe a poly surface with a damp cloth. An oiled surface absorbs what you wipe it with.
One honest caveat about look: oil-based polyurethane adds a permanent warm amber tint and continues to yellow as it cures over years. On walnut that is attractive. On pale maple or ash it is a visible color change, and the answer there is a water-based poly — a product we do not stock, so see where to buy woodworking tools rather than taking a substitute.
The hazard that only lives on one side of this comparison
Rags used with oil finishes — Danish oil, and oil-based poly too — can self-heat as the oil cures and have started fires. This is not a theoretical risk and it is the one part of this page to read twice.
NFPA’s own guidance is specific: never leave cleaning rags in a pile. Take them outside to dry, spread out and weighed down, then put the dried rags in a metal container with a tight cover, kept cool and out of direct sunlight. OSHA’s spray finishing standard (1910.107(g)(3)) requires rags impregnated with finishing material to go into approved metal waste cans immediately after use — which is a workplace rule describing exactly the same hazard in a home garage.
In practice: lay every used rag out flat on the driveway until it is crisp, or drop it in a sealed can of water. Never ball one up and drop it in a bin with sawdust in it. Our shop fire safety page covers the oily-waste can and the extinguisher that belong in a garage where finishing happens.
How to actually apply either one
Both finishes depend far more on what happens before them than on which one you chose. Sand to 180 or 220 grit, vacuum, then wipe with a cloth — finish magnifies every scratch you left behind, and raking light across the surface before you start is how you find them. The full method is in how to sand wood properly and how to apply a wood finish.
Danish oil
Flood the surface generously with a cloth or a brush.
Let it sit for the time the can states — long enough to soak in.
Wipe all of it off. Every bit. Oil left standing on the surface does not cure properly and stays tacky.
Wait overnight, then repeat. Two or three coats is a finish.
Lay the rags out flat to dry before you go inside.
Wipe-on polyurethane
Apply a thin coat with a lint-free cloth, working with the grain.
Leave it alone to dry fully — the recoat time on the can, not your estimate.
Scuff lightly with worn fine abrasive between coats to knock off dust nibs, and wipe clean.
Build three or four coats. More thin coats always beat fewer thick ones.
Same rag rule as oil. Flat, outside, until crisp.
Frequently asked questions
Is Danish oil or polyurethane better?+
Neither is better in general — they solve different problems. Polyurethane builds a protective film and is the right choice for any surface that meets water, wear or heat: tables, desks, shelves. Danish oil soaks in and leaves almost no surface, which looks and feels better and repairs invisibly, so it suits frames, boxes, carvings and tool handles.
Can you put polyurethane over Danish oil?+
Yes, but only after the oil has fully cured, which takes days rather than hours — not merely until it feels dry. An oil-based polyurethane is the safer topcoat over oil. If you want the look of oil with the protection of a film, it is simpler to skip the two-step and use a wipe-on polyurethane, which gives you most of both in one product.
Does Danish oil protect wood from water?+
Barely. It resists fingerprints and dulls slowly, but it does not build a film, so a cold glass will still leave a ring and a spill will still raise the grain. If water resistance matters, use a film finish — that is the one thing oil cannot do.
How many coats of Danish oil or wipe-on poly do I need?+
Two or three coats of Danish oil, each applied generously and then wiped completely off. Three or four thin coats of wipe-on polyurethane, with full drying time between each and a light scuff to remove dust nibs. More thin coats always beat fewer thick ones with either product.
Are oil finish rags really a fire risk?+
Yes. Rags used with oil finishes can self-heat as the oil cures and have caused fires. NFPA's guidance is to never leave them in a pile — dry them outside, spread flat and weighed down, then store the dried rags in a metal container with a tight cover. OSHA's spray finishing standard requires finishing rags to go straight into approved metal waste cans. Treat oil-based polyurethane rags the same way.
Sources
NFPA — Safety with oily rags (tip sheet) — NFPA's own wording: never leave cleaning rags in a pile; take them outside to dry, spread out and weighed down; put dried rags in a metal container with a tight cover, kept cool and out of direct sunlight (accessed August 31, 2026)