How to Apply a Wood Finish
Wipe-on, brush or oil — the method that gets a beginner a good finish first time, plus dust, temperature, recoat times and rag disposal.
How this is funded: we earn a commission if you buy through our links, at no extra cost to you. It never changes which tool we recommend, and we’ll tell you plainly when to skip one. Full disclosure.
Finishing is the last ten percent of a project and about half of what people notice. It is also where beginners most often undo good work — a carefully built box gets a thick, dusty, streaky coat of polyurethane and looks worse than it did bare.
Almost all of that comes from a single habit: trying to build the finish too fast. Everything below is a variation on the same principle. Thin coats, clean surface, right temperature, enough patience.
This page is the method once you have chosen a product. If you have not, the decision almost always comes down to two of them — Danish oil vs polyurethane is that comparison, including the rag-safety rule that applies to both.
Start here: use a wipe-on finish
For a first project, apply the finish with a cloth rather than a brush. Not because brushing is wrong, but because wiping removes the three things that go wrong for beginners.
- You cannot apply it thick. A cloth physically cannot leave the puddle a brush can, so runs, sags and soft under-layers stop being possible.
- There are no brush marks. The commonest visible defect in amateur finishing simply does not occur.
- Mistakes are reversible while wet. A missed patch or a heavy area is fixed by wiping it back, which you cannot do with a brushed coat that has started to set.
The cost is more coats — three or four rather than two — and each one takes about five minutes. Our wood finishes guide covers which product to choose; this page is about applying whichever one you picked.
Before you open the can
The surface
Finish magnifies everything underneath it. A scratch you can barely see on bare wood becomes obvious under three coats, because the finish makes it darker and glossier than the wood around it.
Sand to 150 to 180 for an oil or a stain, or 180 to 220 for a film finish, take a final pass by hand along the grain, and check under raking light — the whole method is in how to sand wood properly. If the finish is water-based, raise the grain first.
The dust
Vacuum the piece, the bench and the floor, in that order, then leave the room alone for an hour so the fine dust settles rather than landing in your first coat. Immediately before applying, wipe the surface with a lint-free cloth lightly dampened with the finish’s own solvent — water for water-based, mineral spirits for oil-based.
The temperature
Every finish has a minimum temperature printed on it, and it applies to the room, the wood and the can — not just the air you have just warmed up. Below it, water-based products fail to form a proper film and oil-based ones slow to a crawl.
And the temperature has to hold for the cure, not just the application. A coat applied in a warm garage that drops to freezing overnight may never harden properly. See heating and cooling a garage workshop; often the best answer in winter is to bring the piece indoors.
Applying it
- Do not shake the can. Shaking whips air into the finish and every one of those bubbles ends up on your surface. Stir gently instead — and stir thoroughly if it is a satin or matt product, where the flattening agents settle to the bottom.
- Work along the grain, in overlapping strokes. Keep a wet edge, and cover the whole surface before going back over anything.
- Do the awkward parts first. Undersides, inside corners and edges, then the show face last, so you are not reaching across a finished surface.
- Wipe off the excess. For penetrating oils and oil-varnish blends this step is mandatory: after the time stated on the can, wipe the whole surface back with a clean cloth. Anything left standing on the surface will stay sticky indefinitely.
- Then leave it alone. Touching a coat to check it is the most reliable way to ruin it.
Between coats
Wait the full recoat time in your actual conditions — cold and humid both extend it, sometimes by a factor of two. Then run a hand over the surface: you will feel dust nibs and raised fibers you cannot see.
Take those off with a very light pass at a fine grit or with a fine abrasive pad, using almost no pressure. You are knocking bumps off, not sanding the finish away — if you go through to bare wood, the patch will show. Wipe the dust off and apply the next coat.
Three or four coats for something handled, five or six for a tabletop, two or three for a penetrating oil. Then let it cure properly before use: touch-dry and cured are different states, and a table that gets loaded on day two will carry the marks permanently.
The rag warning, which is not optional
Rags soaked in oil-based finishes generate heat as they cure. Bunched in a bin or left in a pile, that heat cannot escape, and they can reach ignition temperature on their own with nothing to set them off. This is a real cause of shop fires, not a cautionary myth.
OSHA 1910.107(g)(3) requires rags impregnated with finishing material to go into an approved metal waste can immediately after use, and the underlying risk is identical in a garage. Do one of these, every time:
- Drop them in a sealed metal can with a lid.
- Or lay them out flat, individually, outdoors on concrete until fully dry and stiff, then bin them.
- Or soak them in water in a sealed container until disposal.
What you must not do is screw them into a ball and drop them in the shop bin on your way out. If you would rather buy the problem away, the engineered answer is a self-closing metal waste can — our shop fire safety picks cover one, alongside the extinguisher rating a room full of wood actually needs.
Fixing the four common problems
- Dust nibs. Almost unavoidable in a garage. Sand them off between coats, and give the air longer to settle before each one.
- Runs and sags. Too much finish. Once dry, sand the run flat and recoat. Once you switch to wipe-on, this stops happening.
- Blotchy stain. A property of the species — pine, cherry, maple and birch are the usual culprits — made worse by uneven sanding. Use a pre-stain conditioner or a thin sealer coat, and always test on an offcut of the same board first — the wood stain roundup covers which conditioner goes with which stain and the two-hour window between them.
- Cloudy or milky patches. Usually moisture: applied in high humidity, over a damp surface, or too cold. Let it cure fully; if it does not clear, the coat has to come off.
Food-safe finishes
For a cutting board or anything that touches food, the standard answer is food-grade mineral oil, often blended with beeswax. White mineral oil meeting USP standards is specifically permitted for food contact under 21 CFR 172.878, it never goes rancid the way a vegetable oil does, and it is cheap.
It is a maintenance finish, not a permanent one: you flood the surface, let it soak, wipe the excess, and repeat whenever the board looks dry. A wax blend on top slows the water loss. The whole process is in how to make a cutting board.
Worth knowing: most cured film finishes are inert once fully cured, but a cutting board is a special case because the surface gets cut, and a film finish that is being sliced into will not stay intact. Oil is the right answer there for practical reasons as much as safety ones.
What to use
| Tool | Why you need it | Price |
|---|---|---|
 | The most beginner-proof durable finish. Cloth-applied, thin coats, no brush marks. | $13.20 |
 | An oil-varnish blend. Wipe on, wipe off, and it repairs by reapplying rather than stripping. | $23.14 |
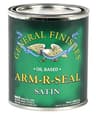 | A step up in durability for a tabletop, still wiped on rather than brushed. | $46.39 |
 | Food-grade mineral oil and wax — the maintenance finish for boards and anything that meets food. | $9.98 |
 | The final buff over a cured finish. The fastest visible improvement of anything here. | $14.29 |
 | Fine sheets for knocking dust nibs off between coats, at very light pressure. | $21.16 |
| Starter kit subtotal | $128.16 | |
Live Amazon prices as of October 21, 2026; they change, and we don’t display stale numbers — a tool with no live price shows “Check price” and is left out of the subtotal. #ad How we’re funded.
The short version
Sand properly, get the dust off, check the temperature, and put it on thin with a rag. Wipe the excess. Wait the full recoat time. Scuff lightly. Repeat three or four times. Deal with the rags safely.
Do that and your first finish will be better than most people’s tenth — because almost every finishing failure is a shortcut on that list rather than a lack of skill.
If the piece you are finishing is an old one rather than something you built, the hard part happens before any of this — getting the previous coating off without sanding through veneer or rounding over the crisp edges that make it look its age. Best tools for refinishing old furniture covers that half of the job, and when not to strip at all.
Frequently asked questions
What is the easiest wood finish for a beginner?
A wipe-on finish — either a wiping varnish or an oil-varnish blend. You apply it with a cloth in thin coats, so runs, drips, brush marks and sags are almost impossible, and any mistake can be wiped back while it is still wet. It takes more coats than brushing, and each one is nearly foolproof.
How many coats of finish do I need?
For a wipe-on film finish, three or four coats on a surface that gets handled, and five or six on a tabletop. For a penetrating oil, two or three, with the excess wiped off each time. More thin coats always beat fewer thick ones — a thick coat skins over and stays soft underneath.
How long should I wait between coats?
Whatever the can says, measured in your actual conditions rather than ideal ones. Cold and humid both extend it, sometimes dramatically. If the surface still smells strongly of solvent or feels at all soft under a fingernail in an inconspicuous spot, wait longer.
Why is my finish still sticky?
Three common causes: it was applied too thick, so the surface skinned over while the layer underneath stayed wet; it was too cold, so the cure stalled; or excess penetrating oil was left standing instead of being wiped off. The fix is usually to wipe the surface back with the appropriate solvent and start again in warmer conditions.
Do I need to sand between coats of finish?
Usually a very light scuff, to remove dust nibs and give the next coat something to key into. Use a much finer grit than you used on bare wood and almost no pressure — you are knocking off bumps, not sanding the finish off. Some products specify a recoat window within which no sanding is needed; follow the can.
What finish is food safe for a cutting board?
Food-grade mineral oil, often blended with beeswax, is the standard and it is what most commercial board conditioners are. White mineral oil meeting USP standards is specifically permitted for food contact under 21 CFR 172.878. It is a maintenance finish rather than a permanent one — you reapply it whenever the board looks dry.
Sources
- OSHA — 1910.107, Spray finishing using flammable and combustible materials — Paragraph (g)(3): rags impregnated with finishing material must go into approved metal waste cans immediately after use (accessed August 11, 2026)
- eCFR — 21 CFR 172.878, White mineral oil — The federal rule permitting white mineral oil meeting USP standards for use in contact with food (accessed August 19, 2026)
- The Wood Database — Reference data on species, hardness, workability and movement (accessed July 24, 2026)
Keep reading
Wood finishes for beginners
Which finish to choose — oils, wiping varnishes, topcoats and wax, with picks and honest cons.
See the picksHow to sand wood properly
The preparation this page assumes. Grit progression, raising the grain and raking light.
Read the guideHow to make a cutting board
A first project that ends in a food-safe finish, start to finish.
Read the project guideHeating and cooling a garage workshop
Finish has a minimum temperature, and a garage in winter does not meet it.
Read the guideWood species for beginners
Some woods blotch badly under stain. Which ones, and what to do about it.
Read the guideBest fire extinguisher for a workshop
Finishing rags self-heat. Worth reading before your first oil finish - plus the oily-waste can that solves it.
See the picks