Woodworking Terms Glossary
Sixty words that plans, videos and lumberyards use without explaining — from four-square and figure to snipe, sled and stock, in plain English.
How this is funded: we earn a commission if you buy through our links, at no extra cost to you. It never changes which tool we recommend, and we’ll tell you plainly when to skip one. Full disclosure.
Woodworking has an unusually large private vocabulary, and almost none of it is explained where a beginner meets it. A plan says “rip to width”, a video says “check it for wind”, a lumberyard ticket says “8/4 S2S FAS”, and the assumption in every case is that you already know.
Here are the sixty words you will actually hit in your first year, grouped by where you meet them, each in a sentence or two. This is a reference page — skim it now, come back when something confuses you.
Lumber and material
- Board foot. The unit hardwood is sold by: 144 cubic inches, which is a piece 12 in by 12 in by 1 in. Volume, not area — which is why a thicker board costs more per foot of length.
- 4/4, 8/4 (“four quarter”). Rough thickness in quarter-inches. 4/4 is nominally 1 in rough and usually finishes near 3/4 in.
- Nominal vs actual. A softwood “2 by 4” is actually about 1-1/2 by 3-1/2 in. The nominal size is what it was before drying and surfacing.
- S4S / S2S. Surfaced four sides, or two sides. S4S is ready to use; S2S still needs its edges done.
- Rough sawn. Straight off the mill, fuzzy and oversized. Cheaper per board foot, and it needs machining before use.
- FAS. “Firsts and Seconds”, the top hardwood grade — long clear cuttings and few defects. Lower grades cost less and are fine for smaller parts.
- Hardwood / softwood. A botanical distinction, not a hardness one. Hardwoods come from broadleaf trees, softwoods from conifers. Balsa is a hardwood; yew is a softwood harder than some of them.
- Janka hardness. A measured resistance to denting. Useful for comparing species for a tabletop or a cutting board.
- Heartwood / sapwood. The dark, dead inner wood and the pale, living outer wood. Heartwood is usually more stable and more rot-resistant.
- Grain. The direction the wood fibers run. Everything about how a board cuts, splits and glues follows from it.
- Figure. Decorative pattern in the surface — curl, quilt, birdseye, flame. Beautiful, and usually harder to plane without tearout.
- Flat sawn / quarter sawn / rift sawn. How the board was cut from the log. Quarter sawn moves less across its width and shows ray fleck in oak; flat sawn is cheaper and shows cathedral grain.
- Plywood, MDF, particleboard. Sheet goods. Plywood is cross-laminated veneers; MDF is compressed fiber; particleboard is chips and glue. See plywood vs solid wood.
- Veneer. A very thin slice of wood glued to a substrate. The face of most plywood is veneer, often under a millimeter thick.
- Kiln dried / air dried. How the moisture was taken out. Kiln dried is faster and reaches a lower moisture content; air dried takes years and is gentler on the wood.
- EMC (equilibrium moisture content). The moisture level a board settles at for the humidity around it. Wood keeps moving until it gets there.
Board defects
- Cup. The board curls across its width, like a shallow trough.
- Bow. It curves along its length, face up.
- Crook. It curves along its length, edge on — a banana in plan view.
- Twist (or wind, said “wined”). The two ends are in different planes. “Checking for wind” means sighting across winding sticks to find it.
- Check. A split along the grain, usually at an end, from drying too fast.
- Shake. A separation between growth rings, present in the tree before it was cut.
- Wane. Missing wood at an edge where the bark was — the board did not quite make full width.
- Pith. The soft center of the tree. Boards containing it move and split unpredictably.
All four shape defects and how to work around them are covered in wood movement explained.
Layout and measurement
- Reference face and reference edge. The one face and one edge you measure everything from. Marked with a pencil squiggle so you never lose track. This single habit removes most cumulative error.
- Four-square (or S4S by hand). Making a board flat, square and parallel on all four surfaces.
- Knife line. A line scored with a marking knife rather than drawn with a pencil. It is narrower, and it severs the surface fibers so the cut starts cleanly.
- Waste side. The side of the line that is not part of your finished piece. You always cut on it. Mark the waste with an X.
- Kerf. The slot a saw blade removes. Always wider than the blade plate, and always on the waste side if you are doing it right.
- Out of square / racking. A frame that has gone from a rectangle to a parallelogram. Checked by measuring both diagonals.
- Winding sticks. Two identical straight sticks stood on edge at each end of a board. Sight across their tops; if they are not parallel, the board is twisted.
- Story stick. A stick marked with the actual positions of parts, used instead of a tape. Transfers dimensions with no arithmetic and no reading errors.
- Proud / flush / shy. Standing above the surface, level with it, or below it.
- Scribe. To mark a part by holding it against the thing it must fit, rather than measuring. Almost always more accurate.
The tools for most of this are in our marking and measuring guide.
Cuts and joinery
- Rip. A cut along the grain, usually to width.
- Crosscut. A cut across the grain, usually to length.
- Miter. An angled crosscut, usually 45 degrees, across the face.
- Bevel. An angled cut through the thickness of a board.
- Chamfer. A small flat cut along an edge, usually decorative.
- Rabbet. A step cut along an edge or end. Open on two sides.
- Dado. A flat-bottomed trench across the grain. The shelf joint.
- Groove. The same trench, running with the grain.
- Mortise and tenon. A hole and a matching tongue. The frame joint.
- Dovetail. Interlocking angled pins and tails that cannot be pulled apart in one direction.
- Half-lap. Half the thickness removed from each of two crossing parts so they finish flush.
- Butt joint. Two parts simply pushed together and glued.
- Pocket hole. An angled hole for a screw that pulls a butt joint tight.
- Caul. A stiff batten used across a glue-up to spread clamping pressure and keep parts flat.
- Squeeze-out. Glue pushed out of a joint under pressure. A thin even bead is the target.
Every joint above is explained properly in wood joints explained, and how to clamp without enough clamps covers cauls and glue-up technique.
Tools and machines
These are the words. If what you want is what each tool is for— a sentence on every machine and hand tool in a home shop, and which ones a first shop can do without — workshop tools and their uses is the companion page, and the rest of the Learn & Build hub covers the skills each one needs.
- Jointer. Makes one face flat and one edge square to it. Cannot control thickness.
- Thickness planer. Makes the second face parallel to the first at a set thickness. Cannot flatten on its own.
- Snipe. The shallow dip a planer leaves at each end of a board.
- Riving knife / splitter. A blade-thickness plate behind a table saw blade that keeps the kerf open. The main defense against kickback.
- Kickback. The workpiece being thrown back at the operator by a spinning blade. Prevented by guards, a riving knife and correct feed.
- Fence. The straight reference a workpiece runs against.
- Sled. A shop-made carrier that rides in the saw’s slots (or through a planer) to hold work safely and squarely.
- Push stick / push block. Keeps hands away from a blade while maintaining pressure.
- Bench dog. A peg in a bench hole that a workpiece pushes against. See workholding accessories.
- Bench hook. A shop-made board that hooks over the bench edge to hold work for hand sawing.
- Collet. The tapered sleeve that grips a router bit’s shank.
- Arbor. The shaft a saw blade mounts on, and the hole size in the blade that fits it.
- Climb cut. Feeding a router or saw in the same direction the cutter spins, so it pulls itself along. See how to use a router safely.
- Honing / grinding. Honing refines an existing edge on a fine stone; grinding reshapes the bevel and removes real metal.
- Burr / wire edge. The tiny lip of metal raised at an edge during sharpening. On a chisel you remove it; on a card scraper you deliberately create one.
Sanding and finishing
- Grit. Abrasive particle size. Higher number, finer scratch.
- Raising the grain. Wiping bare wood with water so surface fibers swell and stand up, then sanding them off. Prevents a rough first coat with water-based finishes.
- Blotching. Uneven stain absorption, common in pine, cherry and maple. Controlled with a conditioner or a sealer coat.
- Open time. How long you have to assemble a joint after spreading glue before it starts to set.
- Cure vs dry. Dry means touch-dry; cure means chemically finished and at full strength. They can be days apart.
- Film finish vs penetrating finish. A film sits on top (polyurethane, lacquer); a penetrating finish soaks in (oils). Films protect more; oils repair more easily.
- Wipe-on. A thinned finish applied with a cloth in thin coats. The most beginner-proof method — see how to apply a wood finish.
- Sanding sealer. A first coat formulated to sand easily and give the topcoat a smooth base.
- Nib. A tiny bump of dust or bubble in a finish coat. Removed by light sanding between coats.
Two references worth owning
A glossary answers “what does this word mean”. Sooner or later you want “why does the wood do that”, and for that a book is still better than a search box.
| Tool | Why you need it | Price |
|---|---|---|
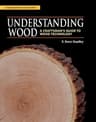 | The reference for why wood behaves as it does — movement, strength, glue and finish, at real depth. | $34.45 |
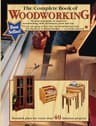 | The broad illustrated beginner reference. Good for looking up a technique you have just met. | $19.85 |
| Starter kit subtotal | $54.30 | |
Live Amazon prices as of October 21, 2026; they change, and we don’t display stale numbers — a tool with no live price shows “Check price” and is left out of the subtotal. #ad How we’re funded.
Our full beginner book roundup covers five, including which one to start with.
The words that matter most
If you learn only five from this page, learn these: reference face, waste side, kerf, grain direction and squeeze-out. Between them they cover why cuts end up the wrong size, why joints have gaps, why boards tear, and whether a glue-up went right — which is most of what goes wrong in a first year.
Frequently asked questions
What does 4/4 mean in lumber?
Thickness in quarter-inches, measured before the board was surfaced. 4/4 — said 'four quarter' — is nominally one inch thick rough, and typically finishes around 3/4 inch once it has been dressed. 8/4 is two inches rough. The system exists because hardwood is sold by the board foot in rough thicknesses, unlike softwood which is sold by nominal size.
What does S4S mean?
Surfaced four sides — the board has been planed flat and parallel on both faces and both edges, so it is ready to use. S2S is surfaced two sides, meaning the faces are done but the edges are still rough. Everything at a home center is effectively S4S; hardwood dealers usually sell rough or S2S unless you ask.
What is the difference between a rabbet, a dado and a groove?
All three are recesses cut into a board. A rabbet is a step cut along an edge or an end, open on two sides. A dado is a flat-bottomed trench running across the grain. A groove is the same trench running with the grain. Dado and groove are the identical cut with different names depending on direction.
What does it mean to four-square a board?
To make a board flat on one face, square on one edge, parallel on the second face and parallel on the second edge — so all four surfaces are true to each other. It is the starting point for accurate work, and traditionally it is done with a jointer and a thickness planer, or with hand planes.
What is snipe?
A shallow dip a thickness planer cuts at the leading and trailing ends of a board, caused by the board being held by only one roller as it enters and leaves. It is managed with infeed and outfeed support, by feeding boards nose-to-tail, and by leaving your stock a few inches long and cutting the sniped ends off.
Sources
- The Wood Database — Reference data on species, hardness, workability and movement (accessed July 24, 2026)
- USDA Forest Products Laboratory — Wood Handbook (FPL-GTR-190) — The U.S. government reference on wood as an engineering material (accessed July 24, 2026)
- The Wood Database — Wood and moisture — How boards take on and give up moisture, and why lumber must acclimate before it is built with (accessed August 19, 2026)
Keep reading
Wood joints explained
The ten joints a beginner meets, what each is for, and how strong it really is.
Read the guideHow to read woodworking plans
Cut lists, exploded views and the dimensions that are lying to you.
Read the guideHow to buy lumber at the home center
Where half these words are printed on a sticker, and what they mean at the rack.
Read the guideWorkshop tools and their uses
The tool half of the vocabulary — what each thing in a shop is actually for.
Read the guideWood movement explained
Equilibrium moisture content, cupping and cross-grain construction, in detail.
Read the guideBest woodworking books for beginners
The references worth owning when a glossary entry is not enough.
See the book picks