How to Learn Woodworking on Your Own
No class, no teacher, no shop. The skill order that actually works, how to practice so you improve instead of repeating mistakes, and where books still beat video.
How this is funded: we earn a commission if you buy through our links, at no extra cost to you. It never changes which tool we recommend, and we’ll tell you plainly when to skip one. Full disclosure.
Learn five skills in this order: measuring and marking, cutting to a line, sharpening, flattening a surface, and one joint. Then build small things that use them. That is the whole method, and it is the opposite of how most people start — which is to pick an ambitious project, buy tools for it, and discover halfway through that the problem was never the project.
A class is genuinely useful, and it is useful for one specific reason: somebody looks at your work and tells you what went wrong within thirty seconds instead of three weeks. You can replicate most of that on your own by building in checks — a square against every corner, a straightedge across every surface, a test cut in scrap before the real cut. What you cannot replicate is enthusiasm from someone who has done it before, so the other half of this guide is about keeping the work small enough that you finish things.
Why skill order beats project order
The intuitive way to learn a craft is to choose a thing you want and make it. In woodworking that fails more often than it works, because errors here are cumulative. A board marked 1 mm long gets cut 1 mm long; the shelf is 2 mm wide across two sides; the carcass racks; the door does not fit. By the time you see the problem you are four steps past its cause, and the lesson you take away is “I am bad at this” rather than “my marking was sloppy.”
Skill order fixes that by making each session have one measurable outcome. Did the line end up square to the edge? Did the saw follow it? Does the chisel shave end grain or crush it? These are questions with yes-or-no answers, which means you can improve without a teacher. Our page on common beginner woodworking mistakes is essentially a list of what happens when people skip this.
1. Measuring and marking
Spend the first evening here and you will save months. Three habits: mark with a knife or a sharp pencil against a square, never freehand off a tape mark; mark the waste side of every line with an X, because a saw kerf is about 1/8 in wide and cutting on the wrong side of the line is a 1/8 in error every time; and work from one reference face and one reference edge, marked with a pencil squiggle, so every measurement on the piece comes from the same two surfaces. The tools and the technique are in marking and measuring tools and how to read a tape measure.
2. Cutting to a line
Draw fifty lines on scrap and cut all of them. That is the exercise, and it is worth two evenings. With a hand saw, learn to start the kerf on the far corner at a low angle and let the saw’s weight do the work. With a circular saw or jigsaw, learn that the blade follows the base plate, so the only real control you have is clamping a guide — how to cut straight with a jigsaw explains why a jigsaw drifts and what to do about it.
3. Sharpening
This is the skill beginners defer and should not, because every other hand-tool skill sits on top of it. A dull chisel needs force; force removes control; lack of control is both bad work and the actual safety risk. You need a stone, a honing guide and twenty minutes. Start with how to sharpen chisels, then how to sharpen a hand plane iron, and read best sharpening stones for beginners before buying anything — the wrong stone makes this harder than it is.
4. Flattening and smoothing a surface
Wood arrives from a home center looking straight and is usually not. Learning to see a twist, a bow and a cup, and then to take them out, is what separates furniture from assembly. The process is in how to square up a board, the tool technique in how to use a hand plane, and the abrasive version in how to sand wood properly.
5. One joint, learned properly
Not all of them. One. A rabbet or a simple dado teaches you shoulder lines and depth control; a dovetail teaches you everything, slowly and painfully. Pick one, cut it ten times in scrap pine, and compare each attempt to the last. Then read wood joints explained to understand where the others fit, and joinery vs fastening for the honest answer about when a screw is simply the right choice.
How to practice so you actually improve
Repetition on its own entrenches whatever you are doing wrong. Three rules make practice productive without anyone watching.
- Make the test measurable.“Cut better” is not a goal. “Ten crosscuts, each one checked with a square, counting how many pass” is. You will see the number improve, which is the feedback a teacher would otherwise give you.
- Change one thing at a time. New saw, new stance and new marking method in the same session tells you nothing about which helped.
- Keep the failures. A shelf of bad joints is the most useful teaching aid you will own, because the mistakes are visible in cross-section and you can see exactly where the chisel wandered.
And finish things. A finished mediocre box teaches more than an abandoned excellent cabinet, because the last 20% of a project — fitting, sanding, finishing — is where half the skills live. Pick from beginner woodworking projects and choose the smaller option every time.
What to look for in a learning source
Before the picks, the honest criteria — because the problem with self-teaching in 2026 is not scarcity of material, it is that most of it is optimized for watch time rather than for teaching. A source worth your evenings does these things:
- It states trade-offs.Any source that says a technique is simply the best, with no conditions, is selling something. Real craft advice always has an “unless.”
- It explains why, not just how.“Plane with the grain” is a rule you will misapply within a week. “Fibers tear out when the cut lifts them against their run” is a principle you can reason from on a board whose grain reverses.
- It is referable mid-task. This is where books still beat video outright: you can hold a page open with a clamp and look at it with glue on your hands. Scrubbing back through a 40-minute video to re-check a dimension is a real cost.
- It assumes modest tools. A technique that needs a jointer, a drum sander and a 14 in band saw is not teaching you anything this year.
- It covers wood as a material.Most beginner frustration is actually wood movement, and it is invisible until you know to look for it — see wood movement explained.
The books that do this well
Four from our registry, each doing a different job. These are the ones we would buy in this order for someone teaching themselves, and the ranked full roundup with honest cons on each is best woodworking books for beginners.
| Tool | Why you need it | Price |
|---|---|---|
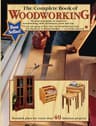 | The one-volume reference to start with. Broad, heavily illustrated, and organized the way a beginner looks things up - tool, then technique, then project. This is the book to own if you own one. | $19.85 |
 | The best book on the actual process of working wood by hand - how to take a board to flat, square and smooth, and why each step comes where it does. Reads like someone correcting you kindly over your shoulder. | $67.65 |
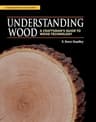 | The material, not the craft. Why boards cup, how moisture moves, what grain direction does to strength. It explains the failures the other books tell you to avoid. | $34.45 |
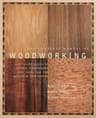 | The widest reference of the four, including joint layout drawings worth working through one at a time. Best as a second book once you know what you need to look up. | $14.05 |
| Starter kit subtotal | $136.00 | |
Live Amazon prices as of October 21, 2026; they change, and we don’t display stale numbers — a tool with no live price shows “Check price” and is left out of the subtotal. #ad How we’re funded.
Where video is genuinely better, and where it misleads
Video wins at motion. Watching somebody start a saw cut, hold a chisel for a paring cut, or feed a router in the right direction conveys in ten seconds what a page of text cannot. Use it for exactly that, and be deliberate about two traps.
The first is shop envy. Channels are filmed in well-equipped shops because the people making them do this for a living, and watching enough of it quietly converts “I need to learn to cut square” into “I need a table saw.” Our tools you do not need page exists because of this effect.
The second is compression. A 12-minute video of a project that took three days has to cut the waiting, the fixing and the parts that went wrong — which are the parts you most need to see. If a build looks effortless, the editing did that, not the maker.
We do not maintain a recommended-channels list, and the reason is a rule we hold ourselves to: we do not publish recommendations we cannot verify from a live source on the day. Channel quality and focus change, and a stale list is worse than none.
A realistic twelve-week plan
One or two evenings a week, no classes, no new machines. Adjust freely — the sequence matters more than the schedule.
- Weeks 1–2. Marking and measuring. Mark and cut fifty lines in scrap. Check every one with a square and count the passes.
- Weeks 3–4. Sharpening. Learn to flatten a back and hone a bevel. Finish when a chisel shaves end grain cleanly without force.
- Weeks 5–6. Surfaces. Take a rough board to flat, square and smooth. Then do it again on a board with reversing grain.
- Weeks 7–8. First project: a small box or a shop appliance like a bench hook. Finish it, including the finish.
- Weeks 9–10. One joint, cut ten times. Keep all ten and line them up.
- Weeks 11–12.Second project that uses the joint and has to fit something real — a shelf for a specific alcove, a box for a specific drawer.
Wear eye protection from week one, and get hearing protection before the first power tool rather than after. OSHA’s eye and face protection standard exists because the injuries it prevents are common and permanent, and a home shop has no safety officer but you. The gear is covered in best safety gear and the habits in shop safety basics.
What you do not need in order to start
A dedicated shop, a table saw, hardwood, or a plan. A sheet of plywood over two sawhorses in a garage bay is a bench; pine from a home center is wood; and the first five projects should be small enough that a plan is a sketch on a scrap. If the space is genuinely the obstacle, woodworking without a garage covers apartment-scale options, and how much it costs to start prices three honest starting budgets from the live feed rather than from guesswork.
Frequently asked questions
Can you teach yourself woodworking?
Yes, and most woodworkers did. What a class buys you is faster correction of mistakes, not access to secret knowledge. Teaching yourself works if you do three things: learn the skills in order rather than by project, build small things you will actually finish, and check your own work against a square and a straightedge instead of against how it looks.
How long does it take to learn woodworking?
You can build something square and solid in a weekend. Reliable, repeatable accuracy - joints that close with no gaps, boards that come out flat - is more like a year of regular evenings. The skills that take longest are sharpening and layout, which is exactly why they are worth learning first rather than last.
What should a beginner woodworker learn first?
Measuring and marking accurately, then cutting to a line, then sharpening, then flattening and smoothing a surface, then one joint. In that order. Almost every beginner failure traces back to the first two: a line drawn freehand off a tape mark is already wrong, and a cut that wanders off a correct line cannot be fixed afterwards.
Is YouTube good enough to learn woodworking?
It is excellent for watching a technique and useless for telling you what you did wrong. Video shows you the motion; a book gives you the reasoning and the sequence you can refer back to mid-cut; and your own test cuts tell you whether it worked. Use all three, and distrust any single source that never mentions a trade-off.
Do you need a workshop to learn woodworking?
No. A sheet of plywood on two sawhorses in a garage bay, or a folding bench in a spare room, is enough to learn everything in this guide. What you actually need is a flat surface, a way to hold the work still, and somewhere to make dust that will not cause an argument.
Sources
- Lost Art Press — The Essential Woodworker by Robert Wearing (publisher's own store) — In stock direct from the publisher at $17.50 in hardcover, against $67.54 on Amazon the same day. A PDF edition and a book-plus-PDF bundle are also offered (accessed September 6, 2026)
- Lost Art Press — The Anarchist's Tool Chest (publisher's own store) — In stock direct from the publisher at $39.00 for the revised edition, signed, against $89.99 on Amazon the same day. The publisher also offers a free PDF of the book, with its own wording that you do not have to register or give up your email address to download it (accessed September 6, 2026)
- USDA Forest Products Laboratory — Wood Handbook (FPL-GTR-190) — The U.S. government reference on wood as an engineering material (accessed July 24, 2026)
- OSHA — 1910.133, Eye and face protection — The standard requiring ANSI-rated eye protection against flying particles (accessed July 24, 2026)
Keep reading
Best woodworking books for beginners
Five books ranked on what they teach and who they suit - the reference half of self-teaching.
See the book picksHow to start woodworking
The practical pillar: first tools, first project and the order to buy things in.
Read the starter guideBeginner woodworking projects
Things small enough to finish, chosen so each one teaches a specific skill.
See the projectsCommon beginner woodworking mistakes
The errors that repeat, why they compound, and how to catch them before the glue is open.
Read the list